Moving content items from www2 to w3
First, log-in to both www2.rpgresearch.com and w3.rpgresearch.com
It is best to work with www2 open in one page and w3 next to it, so you can easily copy+paste between the two.
Next, find the material on www2 that is next to be moved, and also find the appropriate place to create the new item on w3. For example, when moving blogs, find the next blog on www2.The last item that has been moved will be posted in the Odoo chat, so the one following that will be the next in line. Searching on the page for the title can help locate the blog, but keep in mind there are multiple pages to search. Double check the comments in case the item has already been moved.
Open the blog and select "Edit" mode to allow for efficient copy+paste
On w3, go to Research>Archives>Public>Public Blogs
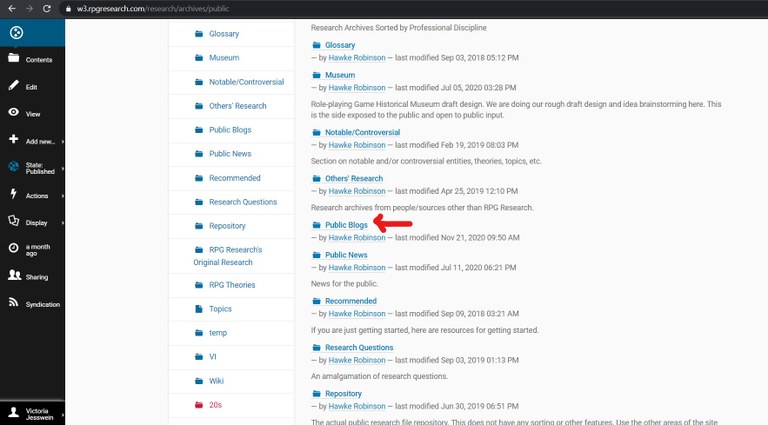
(This tutorial uses Public Blogs as the example, but other content may go in a different place based on type and privacy setting, i.e. Research>Archives>Internal(Private))
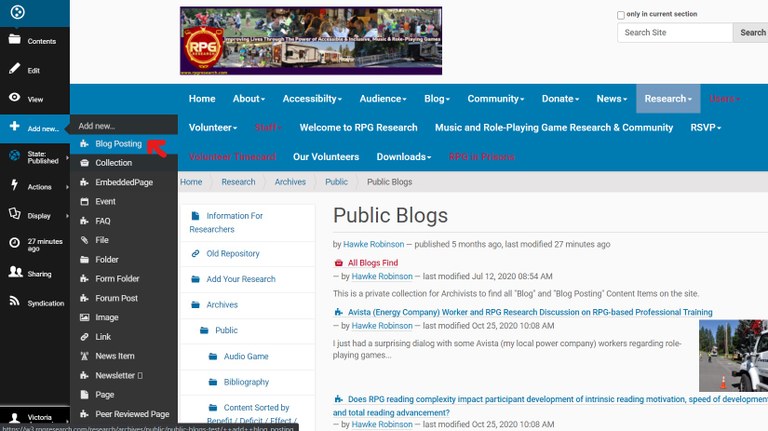
To add a new blog (or any new content item), go to "Add New" in the black menu on the far left and select the appropriate content type, in this case "blog posting."
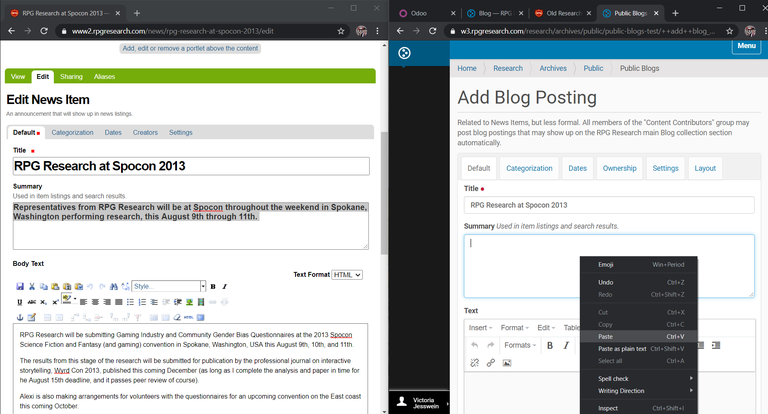
Next, simply copy+paste each box from www2 to w3. Some things to watch out for:
- Internal links -- these URLs need to be changed from www2 to w3 so that they link to the corresponding content on the new w3 site
- Embedded Youtube videos-- You may need to access the video on Youtube, copy the embed code (right click on the video), and then in the w3 text box go to Insert>Media>Embed. Paste the embed code and the video will load within the text box.
- Photos (or other files)-- These need to be downloaded from www2 (right click+save image -- you can rename or not for your own ease of relocating them), and then re-added to w3. For in-text images, go to the "Insert/edit image" button (it looks like a photo of mountains) and add the file(s).
- For "Lead Images" the process is the same, but click "Choose file" and select the correct image file from your downloads. Don't forget to move the "Image Caption" if there is one
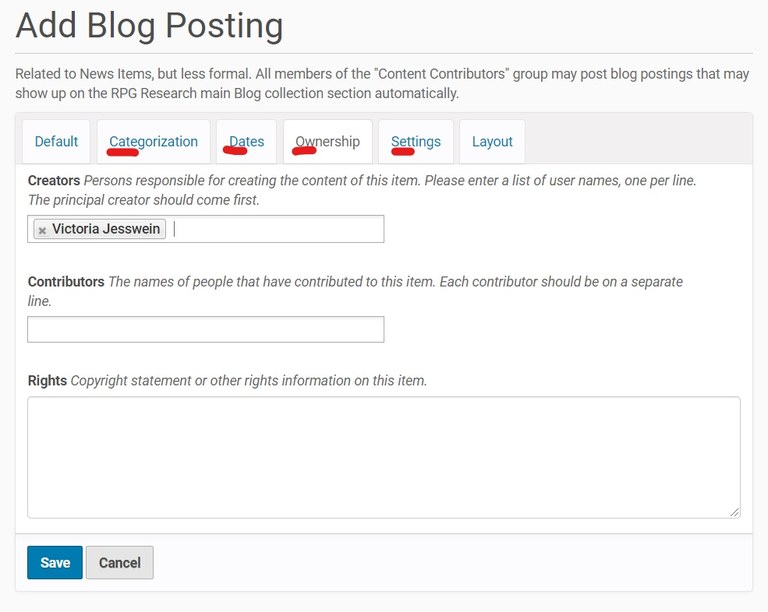
To add tags, go to the "Categorization" tab on each site. Add the tags listed, as well as any that you think are missing/relevant. Be sure to tag blogs as "Blog Posting"
Next, you will need to change the date of the w3 content to match the day it was posted on www2. Select the "Dates" tab and assign the correct year, month, and day for the "Publishing Date." Don't worry about changing the time.
In the "Ownership" tab, it will default to your name. Look to see who wrote the content on www2, and assign that user as "Creator" on w3.
In the "Settings" tab, set "Allow Discussion" to "yes" -- this allows comments on the new content.
Finally, you'll need to add a "change note" on w3. This should have your name and the date it was moved in YYYYMMDD format. For example, a blog I moved today would have the change note "Moved from www2 to w3 by Victoria J. on 20201121"
Don't forget to click "Save" on the new content item in w3, and cancel the edit on www2.
Next, add the same change note as above in a comment on www2, showing that it is content that has been moved and when.
On w3, after saving, go to "State" in the black menu on the left and change the state to "Published"
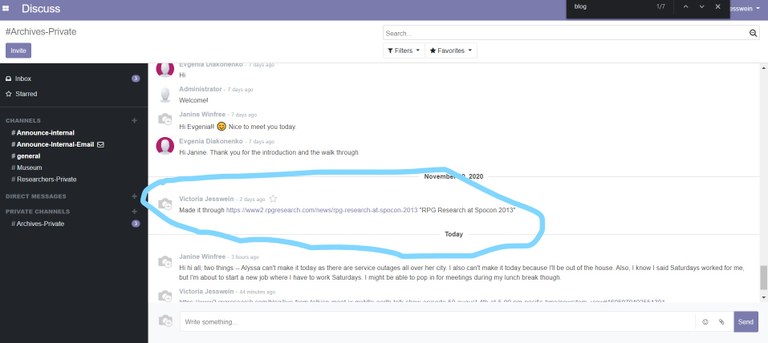
Finally, when you've finished a working session, put the name and link of the last item you've worked on in the Odoo archivists' chat. This lets the other archivists know how far we've gotten, and know to start working on the following content item.
Document Actions
